This guide is helpful for people who want to quickly and efficiently set up your new gadget. After reading our practical short article, you will learn how to set up E Ink tablet without special knowledge or skills. We have collected the most common instructions and valuable tips on how to get the most out of your purchase.
E Ink Tablet Setup Guide: Unboxing and Initial Inspection
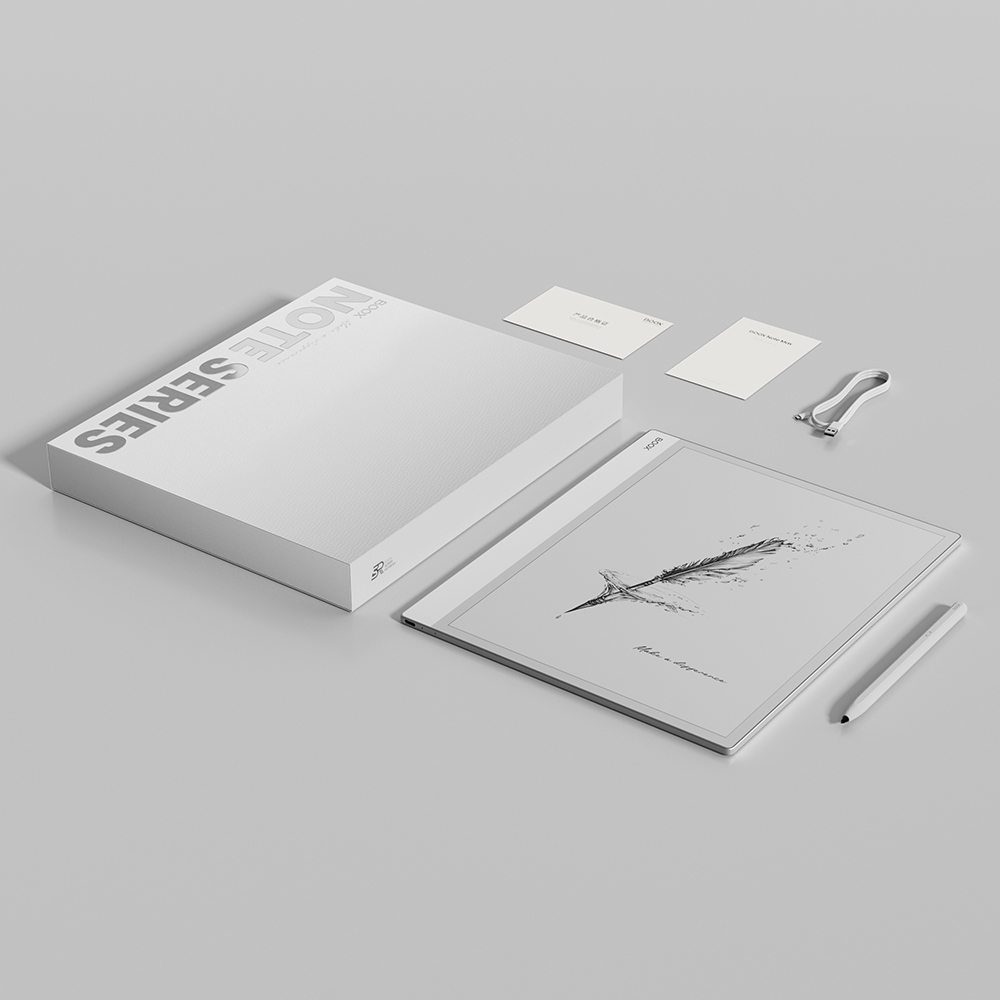
In the package there are such things:
- Device.
- Stylus.
- Charging cable.
- User manual. It is where you can also find important information.
Expert advice: Check the completeness immediately. Please ensure there is no damage (delivery will try to provide the service as reliably and carefully as possible). The gadget’s screen is fragile, so avoid pressure and impacts.
Step By Step E Ink Tablet Setup: Charging the Device
The first things to do on a new E Ink tablet are to read the manual and charge the device. Here are the steps:
- Before first use, fully charge it. It may take 2-4 hours.
- Check the indicator or notification to see when the charge is 100%.
Expert tip: Use only the original charger. It will keep your gadget safe and extend the battery life.
Power On and Initial Setup
How to start using E Ink tablet? The steps are almost the same as those you would do on a regular tablet or phone:
- Press and hold the power button.
- Next, perform the basic setup. You need to select the interface language.
- Connect to your home or office Wi-Fi.
- Log in to your personal existing account. Please create a new one if you don’t have yet.
- Set up the date and time.
Your device is up and running and ready for active use!
Updating Firmware and Software
You already did the E Ink tablet initial setup for your Boox E-Ink Tablets. Sometimes you need to make updates that ensure stability and provide access to new features. Do a few steps:
- Open Settings on the device.
- Select “System Update”.
- Follow the on-screen prompts until the installation is complete.
If there are no updates, the gadget will write the relevant information.
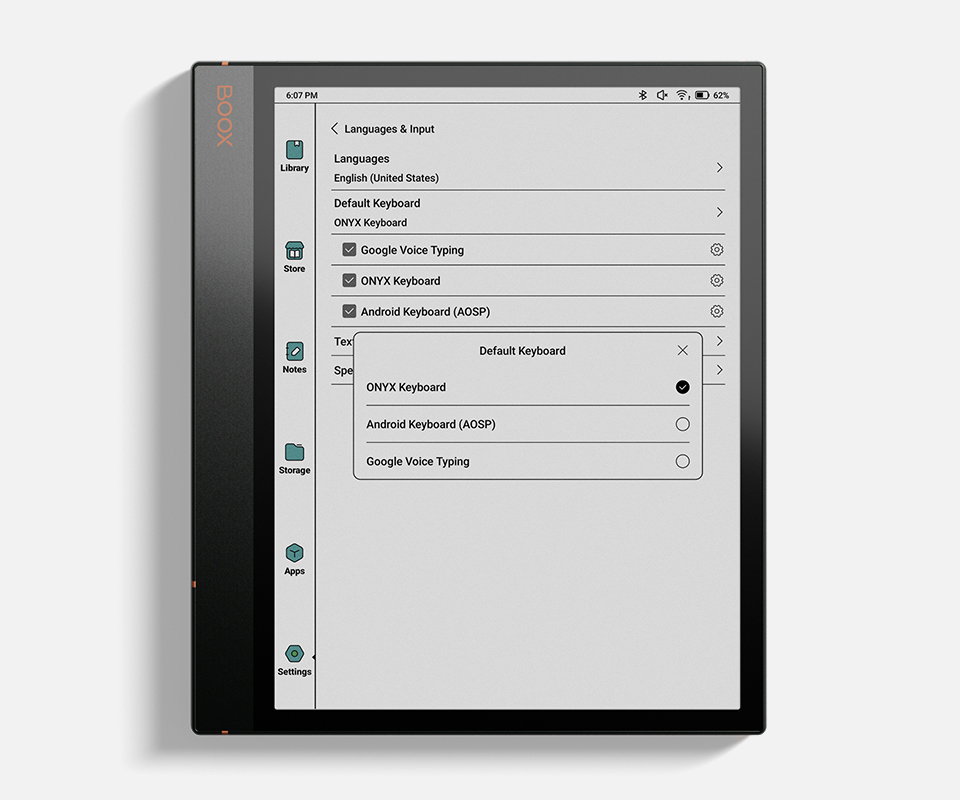
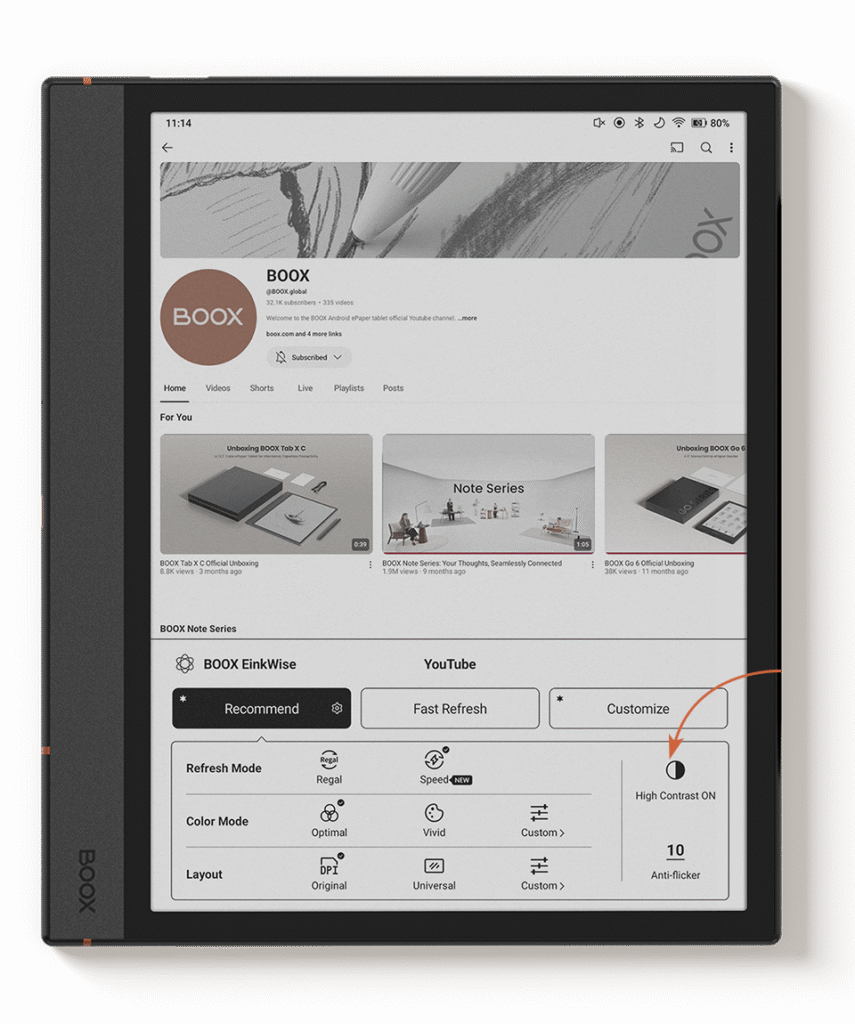
Customizing Device Settings
Step by step E Ink tablet setup consists of several standard settings simultaneously. Among them are the following:
- Display settings. Adjust the brightness and warm tone. Choose a comfortable font size and style. There are also screen refresh modes to reduce trails.
- Adding security. You can set up a PIN code, password, or fingerprint (if supported).
- Stylus settings. Determine the sensitivity of pressing for your Medium Size E-Readers.
It is the base that our customers use.
Installing Essential Applications
The E Ink tablet setup guide also includes information on installing various additional applications.
On Android devices (for example, Boox), you need to do the following:
- Go to Google Play.
- Select and install applications for taking notes, reading, or working with documents.
On other models, you can use branded stores or sideload to download.
Transferring Files and Content
If you change from one gadget to another, you must transfer data.
You can do this in the following way:
- Connect the tablet to the computer or other gadget via a USB cable.
- Use the cloud, where there is data (Dropbox, Google Drive).
- Use branded services (BooxDrop, etc.).
Expert advice: Organize documents in folders and notebooks for the most convenient search.
Conclusion
The first things to do on a new E Ink tablet are charge, start, synchronize data, and download essential applications. Explore the capabilities of the E Ink tablet with the help of the paper manual that comes with it. Now, get the maximum benefit and pleasure from editing and reading.